Without a doubt, your final bicycle touring packing list will vary from ours, and what you decide to bring along will largely depend on a couple factors: (1) Budget (2) Travel experience/expertise (3) Length of tour (4) Tour style. We were beginners with a reasonable budget, heading out on an open-ended tour and we wanted to be prepared. Since our tour, we’ve reflected on what gear was essential and what items were more discretionary. Our bicycle touring packing list is divided into eight categories:
- Bike (and on the Bike)
- Bike Accessories & Tools
- Camping & Cooking
- Electronics
- Miscellaneous
- First-aid
- Toiletries
- Clothes
Most categories are broken down further denoting essential and discretionary items. Additionally, we’ve marked shared items — gear that can be shared between two (or maybe three) tour-goers.
A Quick Note to Bikepackers (aka Ultralight Touring)
We see bike touring as the parent of bikepacking. Bikepacking evolved from the philosophy of cycle touring; mixing in the best from the mountain biking and backpacking worlds.
Two key differences: (1) Bikepackers will usually opt for a mountain bike to take on single-track trails; (2) Bikepackers lighten and narrow their load (making the trails with steeper grades doable) by forgoing standard racks and panniers for leaner bike luggage that fits on the frame, seat, and handlebars. This list is specifically for bicycle touring, but can be modified for the ultralight enthusiast.
What makes packing for Patagonia different?
Patagonia is wild, rugged, and remote. Sometimes, there is more than 100 km of tough riding between any services. You’ll need to plan your food and water reserves, too.
- Tires. Much of the Bicycle Patagonia route is unsealed ripio. And it’s unforgiving. Using road tires will only lead to frustrating battles. Use a hybrid tire or (if you’re willing to sacrifice a bit of speed on the pavement) a mountain bike tire will also work. Ensure your tires have inverted or knobby tread (semi-slick is also possible, but not recommended).
- Clothing. Patagonia is notorious for being temperamental with its weather. It can be anything at any time of day. Bring some stuff to bundle up; a beanie, rain jacket, and gloves are a must.
Bicycle Tour Packing List
– Denotes shared item if cycling in a pair or group.
I. Bike & on the Bike
Essential
- Bike – Touring bicycle preferred, but mountain bike also works. We love Surly’s Long-Haul Trucker.
- Pedals – Flat or dual-sided pedals. Shimano’s SPD series are great for versatility, like the Trail SPD Pedal.
- Saddle – Built for long days. Get a Brooks Saddle and your bum will thank you.
- Tires – Hybrid or mountain bike tires.
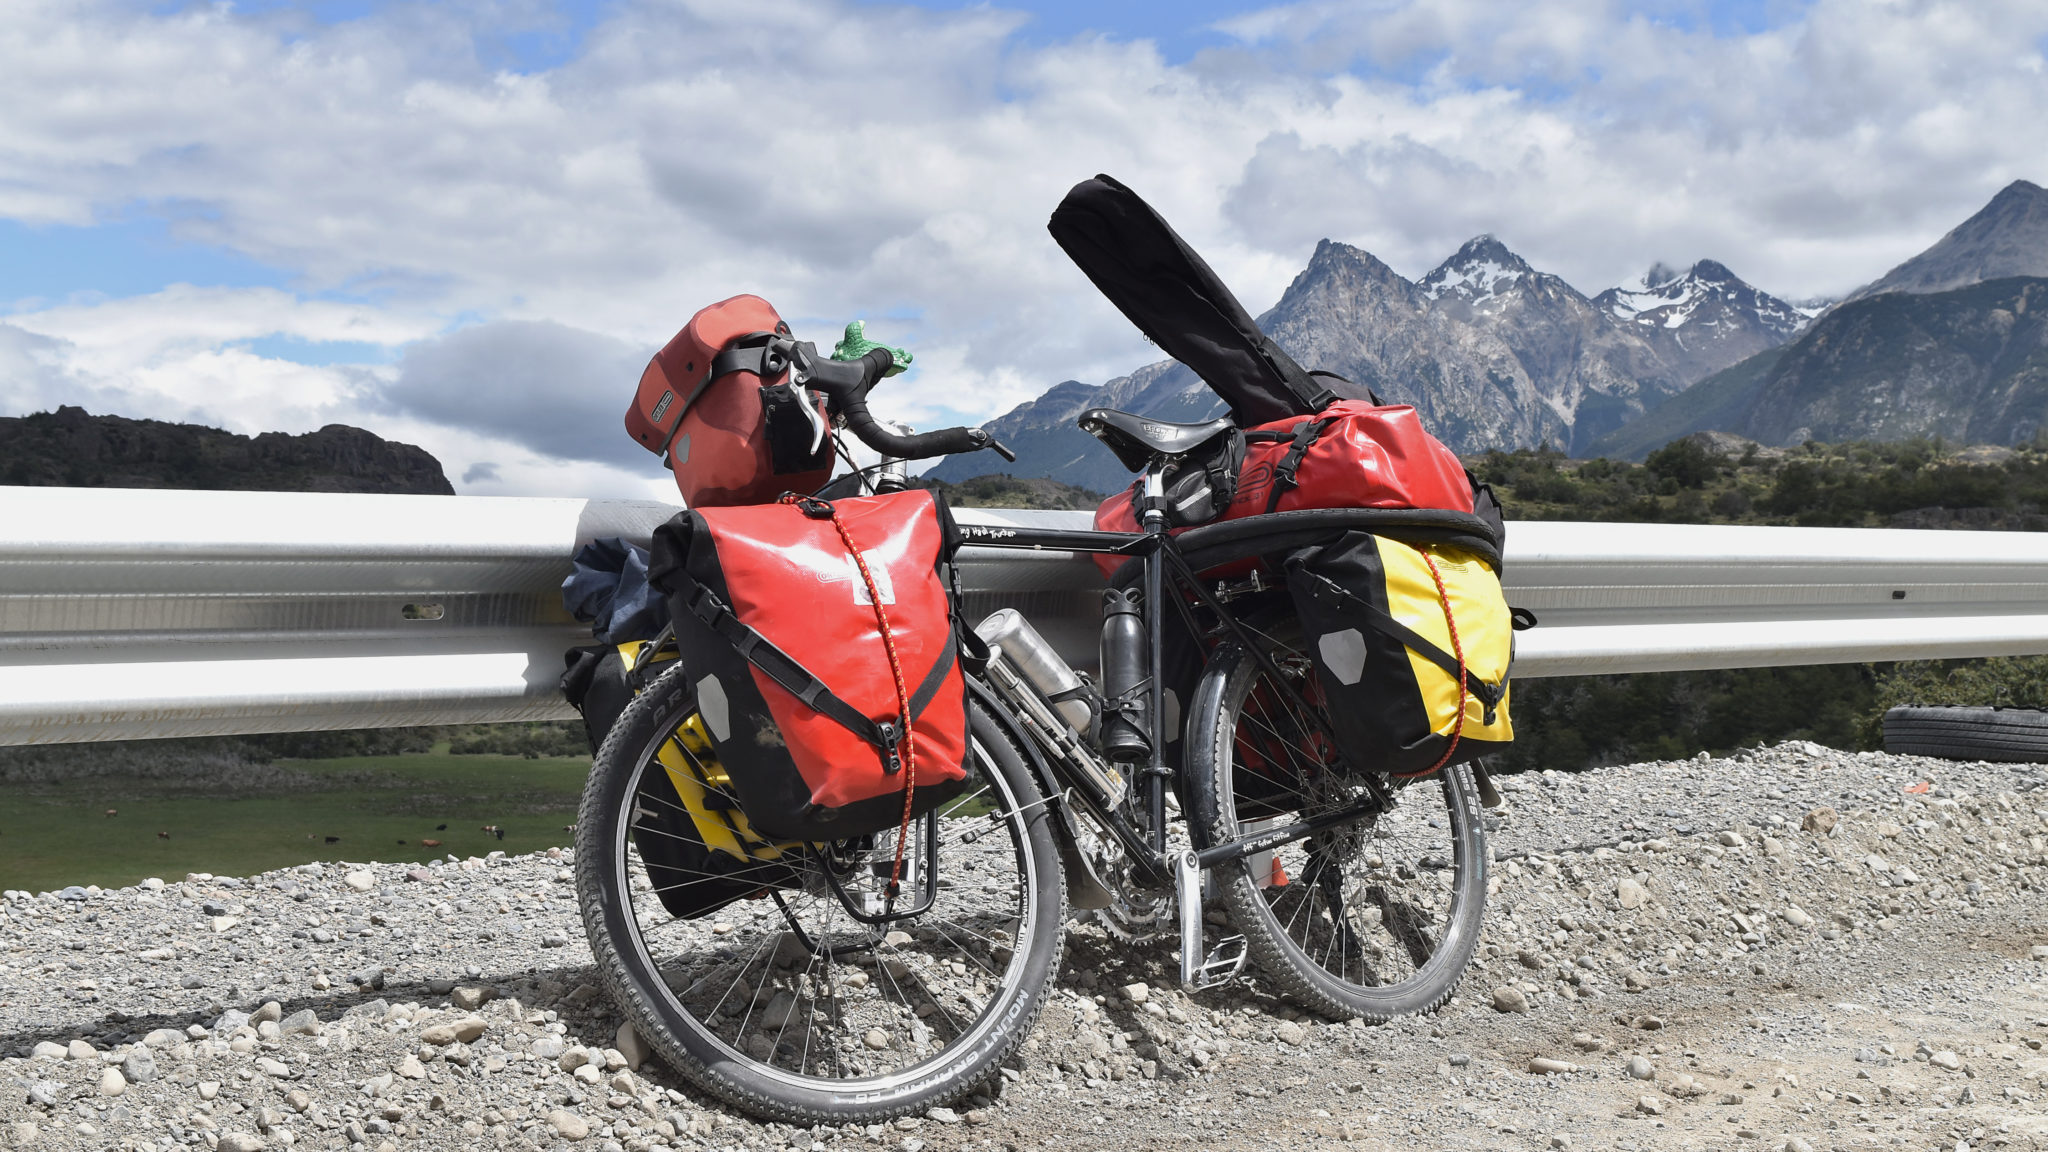
- Back and front racks – One of the most important items. Don’t skimp on these. Get heavy-duty, high-load bearing racks. The bumpy roads will test these. Surly makes them solid.
- Fenders – No need to go luxury on these.
- Panniers – We love the Ortlieb panniers and bags.
- Handlebar bag – Again, Ortlieb has the best.
- Lights – Something easily rechargable is nice. One for the front and another for the back.
- Water bottle storage – How you prefer to stay hydrating will determine how you store your vessels. Arundel make adjustable water bottle cages; great for any size bottle or beverage.
Bikepacking tip: Do without the front and back bike racks and swap the standard panniers for a seat bag and frame bag. Ortlieb has an intro to bikepacking as well as top picks for storage solutions.
II. Bike Accessories & Tools
Essential
- Hand-pump – Lezyne has great products. Getting one with a gauge is preferrable.
- Helmet – Get one that fits.
- Water bottles – Light and durable. Klean Kanteen has a variety of sizes.
- Tire lever – Pedro’s is simple and effective.
- Multitool – Very necessary. The Blackburn Wayside Multitool has everything you should need.
- Extra tubes – You’re going to get a flat somewhere on the journey. Have at least 2 extra tubes on hand.
- Patch Kits – Don’t need anything fancy. Just your standard patch kit will do.
- Lube – If choosing between lube for dry conditions vs wet conditions, go with the lube made for wet conditions. Your favorite lube will do just fine or something standard can be purchased in Bariloche, Coyhaique.
- Pocket knife – Quick fixes, tighten screws, open wine… the works.
- Duct tape – All purpose. Wrap a bit around a toothbrush instead of taking the whole roll.
Discretionary
- Lock and cable – For peace of mind.
- Mirror – Either affix it to your helmet or handlebars.
- Degreaser – If you’re concerned about build up and keeping a clean bike, grab some of this to carry. Generally, you don’t need it for the tour and it’ll just add weight. Gasoline can be used (responsibly) as a degreaser for your bike chain in a pinch.
- A few extra screws – Things jiggle lose. With the right extra screws, you can fix them!
- Pedal wrench – For taking the pedals off. You may be able to find another wrench around that will do the job.
- Water bladder – Either a stand-alone bladder for extra water storage or a hydration system. Really, it’s personal preference. We don’t recommend carrying anything on your back, so if you’re into constant hydration, look into the frame units.
- Spare spokes – Usually come with your bike.
- Spoke wrench – May come on your multi-tool. Could probably get by without one.
- Zip ties – Can be helpful in permanently securing anything that came apart.
III. Camping and Cooking
Essential
- Tent – This is your home and you’ll be happier if you splurge a bit. Hilleberg makes lightweight tents with top-tier materials for all seasons.
- Sleeping bag – You’ll want to optimize for warmth and weight; all without breaking the budget.
- Sleeping mat – This is your bed, trying them out in person is a good idea.
- Pillow – Get one, it’s worth it. Nemo offers a variety of comfy, inflatable pillows.
- Headlamp – Black Diamond has a wide variety of long-lasting headlamps.
- Stove – There are plenty of options for a stove. We suggest going with something versatile, that can (1) be used not only for boiling water, but cooking up delicious meals and (2) takes liquid fuel as opposed to canister fuel. The MSR Dragonfly is exceptional.
- Fuel Bottle – If using an MSR stove, a medium to large size is best.
- Cooking pot – If you’re traveling as a pair or group, bigger is better. Leftovers can be saved. Snowpeak has a wide range of titanium cookware; its lightest and largest, but comes in at $60.
- Mug – Snowpeak makes a light and sturdy titanium mug that won’t leave a lingering smell.
- Bowl/plate – Go light and/or collapsable.
- Spork – Something that cleans well and holds up is key.
- Knife – A knife that can easily be sharpened down the line is a good option here. This will be your one, all purpose knife. Choose wisely.
- Water filter – Life Straw’s gravity filter.
- Water basin – Sea to Summit’s Kitchen Sink is perfect for a variety of camping uses. Most importantly, it enables responsible camping (#leavenotrace). You’re able to collect fresh water then wash dishes or laundry and dispose of the grey water responsibly away from fresh water sources.
Discretionary (but recommended)
- Mixing spoon – While it’s possible to use your spork to stir up your pasta, having a large mixing spoon will do you good in the long run. Any ol’ spoon will do (while plastic is light, opt for wood).
- Coffee filter – Many may ask, “Is this item really optional?” For those who need their coffee before breathing in the morning, this MSR coffee filter is sturdy, cleans easily and, ultimately, is a life saver on those cold mornings.
- Mixing bowl – Good for making salads, keeping the pasta or sauce elsewhere while cooking its counterpart.
- Food Storage – Something to keep leftovers fresh. Any lightweight, food storage container will do. Nalgene makes a reasonably lightweight storage jar that won’t burst and spill its contents in your bag.
- Cutting board – Surely, there are no picnic tables at the wild camp spots; and it’s even rare at organized campsites in Patagonia. Having a hard surface to chop your veggies is important.
- Bungee Cord(s) – Multiple uses. One of the most useful is to secure miscellaneous items to your bike. Need to dry some bike shorts? Strap them on the back of the bike and let them air out.
- Rope – While you don’t need to hang your food from the tree (as there are no bears in Patagonia), a rope is a handy thing to have. From hanging out laundry to creating an impromptu shelter with your tarp.
- Tarp – Keep your bikes dry at night, keep yourself dry for cooking (no cooking in the tent!), sit on it for lunch. You’ll be happy with a lightweight tarp in tow.
Bikepacking tip: The fuel or canisters for the stove will weigh you down a bit, and many bikepackers will forego a traditional backpacking stove and opt for dry-meals and eating out. This works well on shorter or urban tours; however, Patagonia is really neither of those. You’ll be happier with a stove.
IV. Electronics
This category is really personal preference, but here are the common (and maybe not-so-common) items:
- Phone – Most tourers will use their phone as their GPS. Some will get a new SD card for data.
- Laptop – Good for entertainment, better if your cataloguing your journey and sharing with the world. Make sure to get a basic case to protect it.
- E-reader – Even if you’re a book person, you can’t deny the practicability of an e-reader on the bike. Great for lazy days or taking your mind off the mysterious noises coming from outside the tent.
- GPS device – If you already have a phone you probably don’t need a GPS. However, if you’re a stat-junkie or are accustomed to having a GPS or bike computer, bring it.
- Camera – If you bring one electronic device bring this. You’ll want to document your journey whether you’re journaling or not. Make sure to have the appropriate memory cards, batteries and a way to recharge them.
- Tripod – If you are in photography…
- Go-pro – Do you even Go-Pro though?
- Solar panel (device charger) – Get yourself off the grid completely.
- Chargers and/or batteries
- Headphones – We don’t recommend riding with headphones in, but for the plane ride or a noisy hostel, these are good.
- Converter – Chilean outlets are mostly wide double pronged C-plug; while Argentina has both C plug and Type 1. This one should do.
Bikepacking tip: Go minimal – camera and phone along with the charging essentials.
V. Miscellaneous (yet essential)
- Sunglasses – And maybe a back-up pair, just in case.
- Hi-vis vest – Not always needed on the empty road, but a good precaution in and out of busy hubs.
- Passport – Keep a photo of your passport just in case it goes missing along the way.
- Cash money – Some places accept US Dollars, if you are coming from the states, keep a few on hand just in case, the dollar is strong. Otherwise, you’ll get cash from exchanges or ATMs.
- A bit of paper (and a couple pens) – Make a fire starter, jot ideas down, play hang-man.
- Small bag or daypack – Great for buying groceries, day hikes.
VI. First-Aid
- Medications or prescriptions
- Band-aids
- Gauze
- Antiseptic cream
- Hydrocortisone
- Antihistimine
- Tape
- Bug spray
- Alcohol-free cleansing wipes
- Safety pins
- Small scissors
VII. Toiletries
- Toothbrush
- Toothpaste
- Floss
- Soap
- Shampoo/conditioner
- Laundry soap
- Deoderant
- Comb/brush
- Hairties
- Chapstick
- Sunblock
- Facewash
- Lotion
- Antichafe
- Wipes
- Towel
- Waterproof toiletry bag/sack
VIII. Clothing & Accessories
Clothing philosophy
- Keep two categories: on the bike and off the bike. This goes for shoes, too.
- Be prepared for wear and tear. That means probably not getting sucked in to buying this season’s jacket.
- Plan to do laundry about once a week in Patagonia; even if its just hand washing at camp.
- When in doubt, choose comfort/warmth.
Women’s Clothing
Biking
- Sports bra(s) – Rotating between two should suffice.
- Socks – Whatever bike or athletic socks you like plus a pair or two wool socks for cold or wet days.
- Bike shorts – One or two pairs. If you are bringing more than one, maybe mix up the type (i.e. go with pants or capris in addition to shorts).
- Underwear/spandex
- S/S Shirts – Lightweight, moisture wicking, non-cotton short sleeved shirts.
- L/S Shirts – Long sleeved, warm base layer and a lighter pull-over or button down.
- Rain jacket – Something lightweight, but very rainproof.
- Hiking/waterproof pants – For biking in the rain or going for a hike.
- Leggings – For cold days, you can layer with bike shorts.
- Hat – A standard baseball cap to protect you from the sun/rain.
- Gloves – Waterproof, cold weather biking gloves.
- Shoes – Your average hiking shoe will work just fine if you’re riding on flats or dual pedals. Plus, then you don’t worry about having to carry an extra pair of shoes for hiking or walks.
Relaxing
- Underwear/spandex – Wool spandex ftw.
- Comfy bra – If there is such a thing. Yoga-style tanks/bras work great.
- Socks – Save a wool pair for getting cozy you don’t wear while biking.
- Long underwear – Woolen long underwear will keep you warm.
- Long sleeved base layer – Ideally one that’s different than the biking LS base layer to change into at camp.
- Swimsuit
- Casual shorts – Something comfy. Maybe two pairs.
- Casual shirt/tank – Whatever is comfortable.
- Dress – Easy to throw on if it’s hot. Longer maxi dress if you plan on having it double as “fancy” attire.
- Coat – Lightweight, insulated down jacket.
- Sweats – Probably what you’ll wear every day after biking. Stay away from bulky, cotton ones though.
- Warm head gear, beanie or headband – Make sure your head is covered.
- Shoes – It’s nice to change into a fresh pair of shoes at the end of the day; whether they’re sandals, sneakers or slippers is up to you.
Men’s Clothing
Biking
- Socks – Whatever bike or athletic socks you like plus a pair or two wool socks for cold or wet days.
- Bike shorts – A couple pairs. If you are bringing more than one, mix up the type. Go with pants in addition to shorts.
- S/S Shirts –Lightweight, moisture wicking, non-cotton short sleeved shirts.
- L/S Shirts –Long sleeved, warm base layer and a lighter pull-over or button down.
- Rain jacket – Something extremely lightweight, but very rainproof.
- Hiking/waterproof pants – For biking in the rain or going for a hike.
- Leggings – For cold days, you can layer with bike shorts
- Hat – A standard baseball cap to protect you from the sun/rain.
- Gloves – Waterproof, cold weather biking gloves.
- Shoes – Your average hiking shoe will work just fine if you’re riding on flats or dual pedals. Plus, then you don’t worry about having to carry an extra pair of shoes for hiking or walks.
Relaxing
- Underwear/spandex – Comfy boxers/briefs.
- Socks – A wool pair you don’t bike with.
- Long underwear – Wool long underwear will keep you warm.
- Long sleeved base layer – Ideally one that’s different than the biking LS base layer to change into at camp.
- Trunks
- Coat – Lightweight, insulated down jacket.
- Casual shorts
- Casual shirt/tank
- Sweats – Probably what you’ll wear every day after biking.
- Warm head gear, beanie or headband – Make sure your head is covered.
- Shoes – It’s nice to change into a fresh pair of shoes at the end of the day; whether they’re sandals, sneakers or slippers is up to you.